
<개발 환경 및 물품>
- Raspberry Pi 4B (Ubuntu 18.04 / ROS melodic)
- Arduino mega
- WS2812 Flexible LED (https://www.devicemart.co.kr/goods/view?no=1328618#goods_file)
<참조>
- https://blog.naver.com/no1_devicemart/221325255307
- https://chackhansaram.tistory.com/3?category=1233803
Step1. Raspberry Pi 4B에 Ubuntu 18.04 및 ROS melodic 설치
Raspberry Pi 4B에 Ubuntu 18.04 설치하기
- 준비물 : Raspberry Pi 4B, SD Card, SD Card Reader - 참조 : https://www.youtube.com/watch?v=zasvSKaobVI&t=576s (유투브 구선생) Step1. SD Card 포맷 - SD 카드를 USB 리더기에 꽂아주고 PC에 연결합..
do-9un6.tistory.com
Ubuntu 18.04에 ROS melodic 설치하기
- 개발환경 : Raspberry Pi 4B (Ubuntu 18.04) - 참조 : http://wiki.ros.org/melodic/Installation/Ubuntu Step1. Ubuntu 18.04 설치 https://do-9un6.tistory.com/2 참고 Step2. ROS melodic 설치 - Ubuntu 18..
do-9un6.tistory.com
Step2. Linux용 아두이노 IDE 설치
- 아래의 링크에서 Linux용 아두이노 IDE를 설치하고 압축해제합니다.
https://www.arduino.cc/en/software
Software
Open-source electronic prototyping platform enabling users to create interactive electronic objects.
www.arduino.cc
- 아래 명령어를 통해 압축을 푼 폴더로 이동한 후 설치를 진행합니다. (버전은 다를 수 있음)
$ cd arduino-1.8.13
$ sudo ./install.sh
- 한글폰트를 설치
$ sudo apt install fonts-nanum-coding
$ sudo apt-get update
//입력 후 아두이노 재실행
Step3. 아두이노와 ROS 인터페이스
- 아두이노 보드와 ROS를 인터페이싱한다는 것은 일반 ROS 노드처럼 발행/구독이 가능한 ROS 노드를 아두이노에서 실행하는 것을 의미합니다. PC (Raspberry Pi / Ubuntu 18.04 / ROS melodic)와 아두이노의 주요 통신은 UART를 통해 이루어지는데, ROS Serial이라는 전용 프로토콜이 있으며, ROS Serial message를 인코딩 및 디코딩 할 수 있는 ROS 메타패키지로서 구현됩니다. 즉, ROS Serial 프로토콜을 이용하여 UART를 통해 ROS 노드처럼 Arduino를 발행 및 구독할 수 있습니다. 흔히 말해 ROS Serial 통신을 하는 것 입니다.
- 먼저, PC (Raspberry Pi / Ubuntu 18.04 / ROS melodic)에서 rosserial 메타패키지/클라이언트 패키지를 설치합니다.
$ sudo apt-get install ros-melodic-rosserial
$ sudo apt-get install ros-melodic-rosserial-arduino
Step4. Flexible LED 아두이노 라이브러리 다운
- 아두이노 IDE를 실행시켜 File - Preference에 들어가서 Sketchbook location을 설정해줍니다.
Arduino board preference
- sketchbook location으로 가서 libraries 폴더가 없다면 생성해줍니다. 모든 Arduino 라이브러리를 보관하는 곳입니다.
- 터미널 창을 열어 libraries 폴더로 들어가 Arduino용 ros_lib 라이브러리를 생성합니다.
$ cd libraries
$ rosrun rosserial_arduino make_libraries.py .
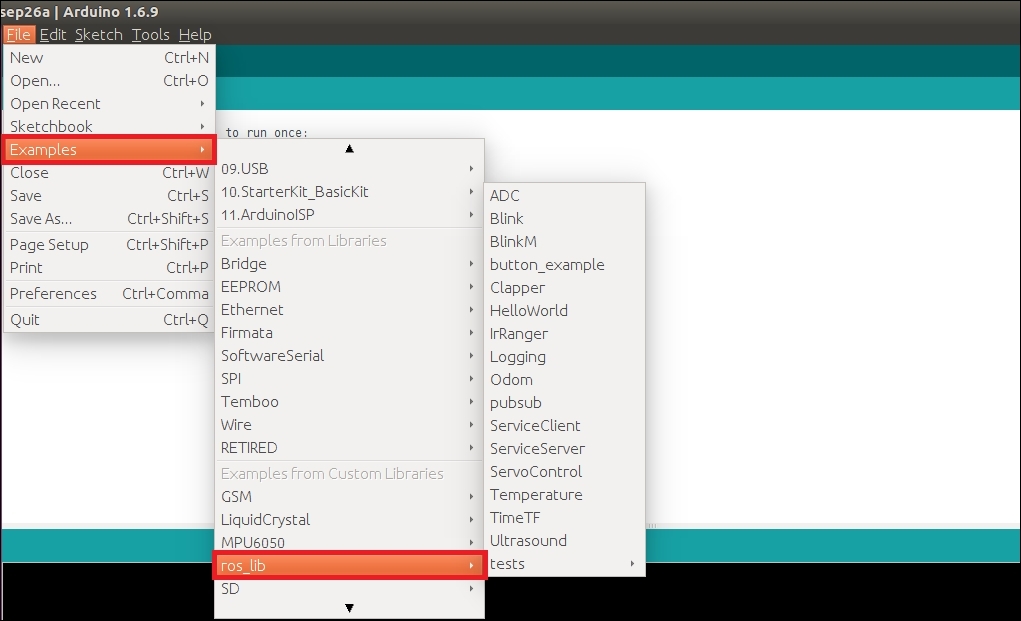
- 아두이노 IDE에서 File - Examples 에 보면 ros_lib을 확인하실 수 있습니다.
- 툴 - 라이브러리 관리 클릭하여 Adafruit NeoPixel 라이브러리를 설치해줍니다.
Step5. Flexible LED 코드 컴파일
- 코드를 컴파일하여 에러가 없는지 확인합니다.
(참고로 코드는 원하는 상황에 맞게 수정하여 사용해야합니다.)
- 에러가 발생한 경우
In file included from /home/kk/Arduino/libraries/ros_lib/std_msgs/Time.h:7:0,
                 from /home/kk/Arduino/libraries/ros_lib/ros/node_handle.h:40,
                 from /home/kk/Arduino/libraries/ros_lib/ros.h:38,
                 from /home/kk/Arduino/libraries/ros_lib/examples/HelloWorld/HelloWorld.pde:6:
/home/kk/Arduino/libraries/ros_lib/ros/msg.h:40:10: fatal error: cstring: No such file or directory
 #include <cstring>
          ^~~~~~~~~
compilation terminated.

exit status 1
Error compiling for board Arduino Leonardo.
위와 같은 에러가 나타난 경우,
~/Arduino/libraries/ros_lib/ros 이 경로에 있는 msg.h라는 파일을 열어
#include <cstring> 을 #include <string.h>로 바꿔주고
std::memcpy() 을 memcpy()로 바꿔주니 아두이노 컴파일 에러가 없어졌습니다.
참고 : https://answers.ros.org/question/361930/rosserial-arduino-compilation-error-no-cstring/
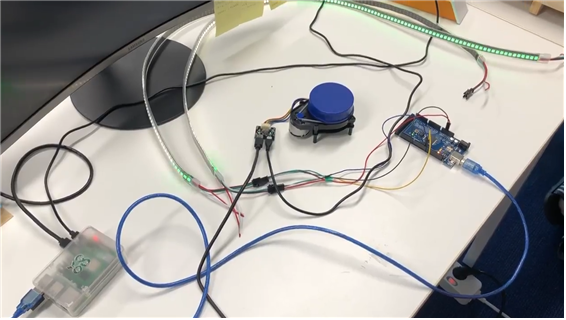
Step6. Flexible LED 연결 및 코드 업로드
- 아두이노와 PC(Raspberry Pi)를 연결합니다.
- led의 gnd선과 아두이노 보드의 gnd
- led의 5V선과 아두이노 보드의 5V
- led의 data선과 아두이노 보드의 6, 7번 핀을 연결해줍니다.
- 참고 : https://blog.naver.com/no1_devicemart/221325255307
[LED] WS2812 SK6812 LED 구동 방법 :: 스트립 타입 LED 편 (+예제코드)
WS2812 SK6812 스트립 타입 LED 안녕하세요. 디바이스마트입니다. [LED] WS2812 SK6812 LE...
blog.naver.com
Step7. ROS를 통한 아두이노 Flexible LED 작동
- 라즈베리파이에서 터미널 창을 열어 해당 명령어를 입력하여 ROS Serial 노드를 실행합니다.
$ roscore
$ sudo chmod 766 /dev/ttyACM0
$ rosrun rosserial_python serial_node.py __name:=arduino _port:=/dev/ttyACM0 _baud:=57600
- 본인이 코드에서 정한 "{data: [n, n, n]}" 값을 입력하여 원하는 LED의 기능을 실행시킵니다.
$ rostopic pub /switch std_msgs/UInt16MultiArray "{data: [1, 0, 0]}" --once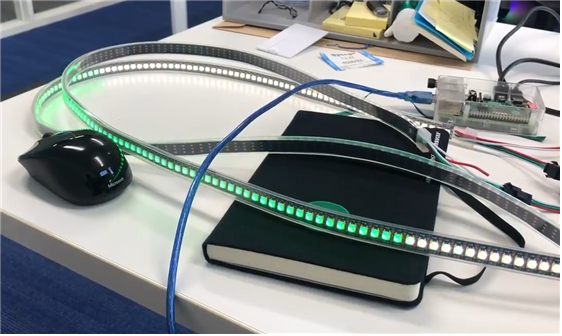
'작업 일기' 카테고리의 다른 글
| ROS를 이용하여 Velodyne Lidar (VLP-16) 구동시키기 (1) | 2021.12.01 |
|---|---|
| Raspberry Pi 4B에서 모터 드라이버 (MD200T) 구동하기 (0) | 2021.11.12 |
| Arduino와 ROS로 IMU 센서 (MPU 9250 ) 사용하기 (0) | 2021.10.27 |
| Raspberry Pi 4B에서 ydlidar 구동하기 (0) | 2021.10.26 |
| Ubuntu 18.04에 ROS melodic 설치하기 (0) | 2021.10.21 |


